
REVIEW · WORKSHOPS
Leather belt making workshop
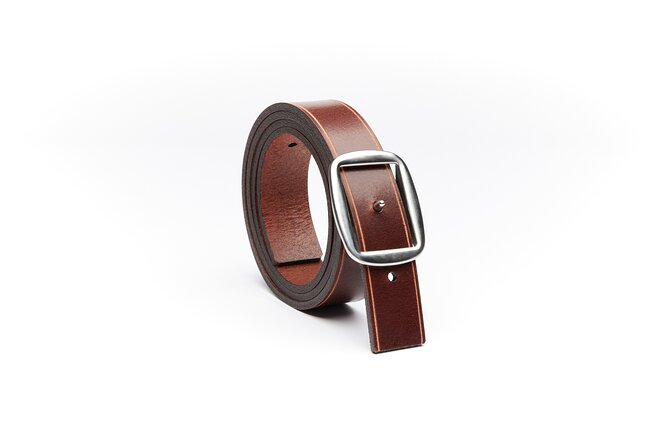
A leather belt, made by you. In Montreal’s Plateau-Mont-Royal, Flechr By Kimberly Fletcher teaches a hands-on leather belt workshop that ends with something you can actually wear. It’s offered in English and capped at just 4 people, so the instruction stays personal.
I especially like the beginner-friendly focus on real leathercraft skills, from choosing the hide to cutting, shaping, and assembling your belt. And Kimberly Fletcher is guided by a teaching style described as patient and good-humored, which matters when you’re learning something physical and detail-driven for the first time.
One consideration: this class includes a few hammer blows, so if you have high sensitivity to noise, you may want to think twice and plan accordingly.
In This Review
- Key things to know before you go
- Finding Flechr By Kimberly Fletcher in Plateau-Mont-Royal
- The 2.5 Hour Belt-Making Flow: From Leather Choice to Finished Belt
- Leather selection: the part that affects everything
- Cutting and shaping: turning a hide into a belt body
- Assembling the belt for durability and fit
- Finishing techniques: making it look finished and feel personal
- Noise, tools, and who should consider this workshop
- Why this workshop scores 5 out of 5 for first-time makers
- Should you book the leather belt workshop in Montreal?
- FAQ
- Where does the leather belt workshop start?
- How long is the workshop?
- Is the class offered in English?
- Do I need prior leatherworking experience?
- Is it loud?
- How big is the group, and what age is it for?
Key things to know before you go
- Small group size (max 4): you get more attention than in big classes.
- English instruction: designed for English-speaking participants.
- Beginner welcome: no prior leatherworking experience is required.
- Hands-on tools and technique: expect the belt-making process, including a few hammer blows.
- 2.5 hours total: a focused session from start to finish, ending back at the meeting point.
- Recommended age 13 and up: most people can participate, but the noise note is important.
Still shortlisting? Here is how a few other Montreal bookings stack up.
- Montreal: Guided Bus Tour★ 4.4 · 3,064 reviews
- Montreal: Hop-On Hop-Off Double-Decker Bus Tour★ 4.1 · 2,760 reviews
- From Montreal: Quebec City and Montmorency Falls Day Trip★ 4.5 · 2,669 reviews
- Montreal Mile End Authentic Food Tour with 7 Delicacies Tastings★ 5.0 · 2,598 reviews
Finding Flechr By Kimberly Fletcher in Plateau-Mont-Royal
This workshop is set up in Montreal, with the start and end at the same spot: 5450 Rue de Bordeaux, Montréal, QC H2H 2A8. That simple “start where you meet, end where you began” format is handy when you want to slot this into a day of exploring without juggling extra transit plans.
The location is also described as near public transportation, which you’ll appreciate if you’re already moving around the Plateau. Since the session is about 2 hours 30 minutes, you don’t need a half-day buffer like you would for longer craft trips.
Also note the group limit is 4 travelers. In practice, that usually means less time waiting around and more time learning. The flip side is you’ll want to arrive on time, because the instructor’s attention is spread across a small number of people, not a large class.
The 2.5 Hour Belt-Making Flow: From Leather Choice to Finished Belt
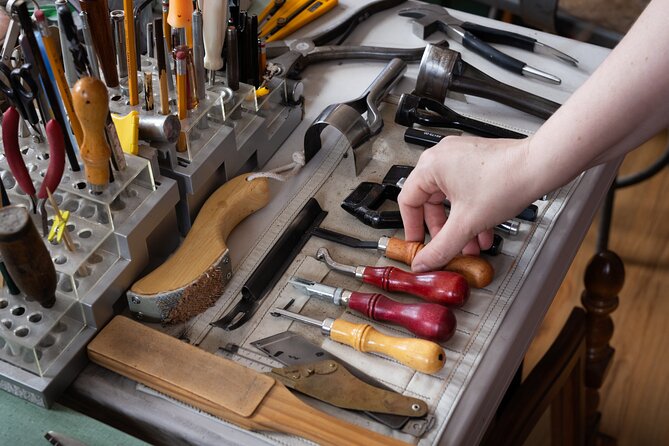
The core idea here is straightforward: you learn the basics of leathercraft and create a leather belt you can keep. The class teaches you how to select a suitable leather, cut and shape it, assemble the pieces, then finish the belt so it looks finished and feels durable.
The session is short enough that you won’t get lost in theory. You’ll spend your time where it counts: doing the steps. That’s great value for a first-time maker because you’ll leave with a tangible outcome, not just a demo or a sketch.
Even if you’ve never held a leather tool before, you can feel confident going in. The course is designed for beginners, with guidance through each stage. If you like learning by doing, this class fits your style.
Leather selection: the part that affects everything
Leather might look like one material from far away, but your experience with the finished belt depends heavily on what you start with. This workshop includes instruction on how to choose the right type of leather, which is exactly the kind of detail that makes beginners better faster.
Here’s why that matters. The leather affects how your belt holds its shape, how it behaves when you cut and assemble it, and how the finished belt feels against clothing. When you learn the selection logic, you’re not just following steps, you’re understanding what will change the result.
If you’ve ever bought a belt that felt flimsy, stretched too much, or lost its shape after a short time, you’ll recognize the connection. This class aims to give you the same kind of “this is why it works” knowledge that seasoned makers use.



Cutting and shaping: turning a hide into a belt body
Once you’ve picked the leather type, the next steps are where the project becomes real. You’ll be taught how to cut and shape the pieces to form the belt. This is the stage where precision starts to matter, but the class is built to guide you through it rather than throw you in alone.
For you, cutting and shaping can feel intimidating at first. That’s normal. The helpful part is that it’s not just about making something go onto a table. It’s about learning technique: how to approach the shape, how to think about alignment, and how to treat the leather carefully so the belt holds together as intended.
Also, since it’s a small group, the instructor can notice when you’re drifting off technique and help you correct course early. In leathercraft, small errors can compound quickly, so that early check-in is a real advantage.
Assembling the belt for durability and fit
After the belt pieces are cut and shaped, you’ll move into assembling the components. The class covers the basics of how the pieces go together to create a belt that’s meant to be durable, not just decorative.
Assembly is usually where people discover whether their planning was solid. Even without prior experience, you’ll get guided through how to put the construction together step-by-step. The benefit of being in a max 4-person group is that you’re more likely to get troubleshooting help while you’re still working, instead of waiting until the end.
This is also the part of belt-making that feels most like “real craftsmanship.” It stops being a craft project and starts becoming a functional item.
Finishing techniques: making it look finished and feel personal
A belt isn’t only about structure. It’s also about how it looks and how it wears. This workshop includes finishing techniques so your belt becomes truly unique, and so it has that completed, wearable feel.
Finishing is where your personality can show up, even in a beginner workshop. Maybe it’s the look you choose, or the way you handle edges and surface presentation. Whatever the exact techniques taught during your session, the goal is the same: leave with something that looks like it belongs in your wardrobe.
I like this approach because it avoids the “you made parts, now the real work happens later” trap. Here, the course is designed so the final result is the actual belt, finished enough to wear.
Noise, tools, and who should consider this workshop
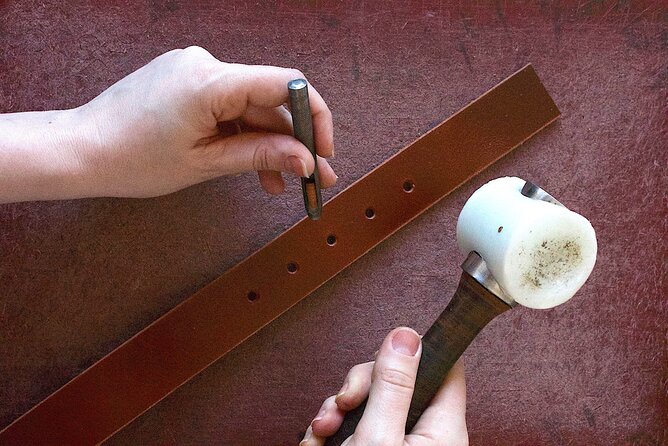
You should know up front that the class has a noise consideration. The information notes a few hammer blows will be necessary to create the belt. If you have high sensitivity to noise, the guidance is to refrain.
That’s not the kind of detail you want to find out after you arrive. So take it seriously. If noise is a concern, you can use this to make a decision early instead of suffering through it.
On the other hand, if hammer sounds don’t bother you, the workshop is a straightforward two-and-a-half-hour maker experience. You’re not dealing with an all-day studio commitment, and the group stays small, which usually keeps the pace steady.
Also, service animals are allowed, and the class is accessible in the basic sense that most travelers can participate. The recommended age is 13 and over, so it’s a good option for teens who want a practical hands-on project and for adults who want a new hobby.
Why this workshop scores 5 out of 5 for first-time makers
The class holds a 5 out of 5 rating from 17 learners, and it’s recommended by 100% of them. That kind of consistency usually means the experience is reliably good, not hit-or-miss.
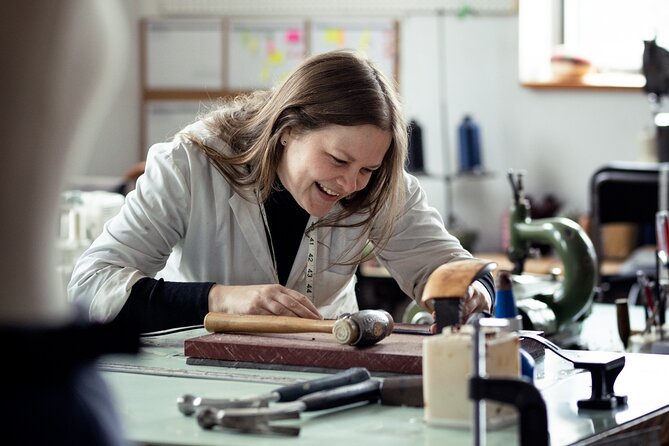
The most praised element is instruction quality, especially Kimberly Fletcher’s style. People highlight that Kimberly is a skilled master craftswoman who brings patience and humor to the process. That combination is more than nice to have. In a craft where technique matters, feeling supported is what helps beginners succeed without getting frustrated.
I also think the small group size supports that high satisfaction. When the class is limited to 4 people, you’re less likely to feel ignored. You get more chances to ask questions and get corrected quickly. That makes a real difference when you’re learning leather basics for the first time.
In terms of value, this is the kind of class that can feel worth your time because you leave with a wearable belt, not just knowledge. For a first project, that’s a big deal. It’s also a way to try leathercraft as a hobby, without committing to equipment purchases.
Should you book the leather belt workshop in Montreal?
Book it if you want a hands-on creative activity where the goal is simple: learn the basics and leave with a belt you made. It’s a smart choice for beginners, and the small group size makes it feel more like guided training than a casual craft session.
Consider skipping or asking questions first if you have high sensitivity to noise, since hammer blows are part of the belt-making process. Also, if you prefer activities that are mostly visual or low-touch, this one is more hands-on and technique-based.
If you’re in Montreal and you like learning practical skills you can actually use again, this belt workshop at Flechr By Kimberly Fletcher is an excellent pick for a focused 2.5-hour block.
FAQ
Where does the leather belt workshop start?
The workshop meeting point is at 5450 Rue de Bordeaux, Montréal, QC H2H 2A8, Canada, and the activity ends back at the same meeting point.
How long is the workshop?
The experience lasts about 2 hours 30 minutes.
Is the class offered in English?
Yes, the workshop is offered in English.
Do I need prior leatherworking experience?
No. The course is designed for beginners and Kimberly guides you through every step.
Is it loud?
A few hammer blows will be necessary to create the belt. If you have high sensitivity to noise, the information recommends refraining.
How big is the group, and what age is it for?
The class has a maximum of 4 travelers. It’s recommended for ages 13 and over, and most travelers can participate.
Just off the notebook: recent Montreal write-ups
- Secret Food Tours: Montreal – Jean-Talon & Little Italy
★ 4.0 · 4 reviews - Montreal to Quebec City Tour with Private Transportation
★ 5.0 · 4 reviews - Montreal: Iconic Landmarks All-Inclusive VIP Experience
★ 4.7 · 4 reviews - A Walking Tour of Old Montreal
★ 3.8 · 4 reviews - Day at Mont-Tremblant National Park
★ 4.0 · 5 reviews - Old Montreal: Self-Guided Tour from Place D‘Armes to Old Port
★ 5.0 · 5 reviews
Workshops, compared.
 ★ 5.0The Bagel Class presents : Montreal Bagel Making Workshop!From $69463 reviews
 ★ 5.08 Iconic Stops. 12 Comfy Seats. See Banff’s Best in First Class.From $149316 reviews
 ★ 5.0Athabasca Canyon Run Family Rafting: Class II Plus RapidsFrom $95193 reviews
 ★ 5.0Sunwapta Challenge Whitewater Rafting: Class III RapidsFrom $103139 reviews
 ★ 5.0Class 3 Sunwapta River Rafting Adventure in JasperFrom $11033 reviews
 ★ 4.4Montreal: Cooking Class & Lunch with Michelin-Trained ChefFrom $12832 reviews
 ★ 4.8Quebec: Cuivres A. Gilles – (Free Entry) Fee for WorkshopFrom $1219 reviews
 ★ 4.5Montreal Cooking Class & Wine Tasting with Michelin Chef RobertFrom $22914 reviews
Browse the lists this tour appears in