
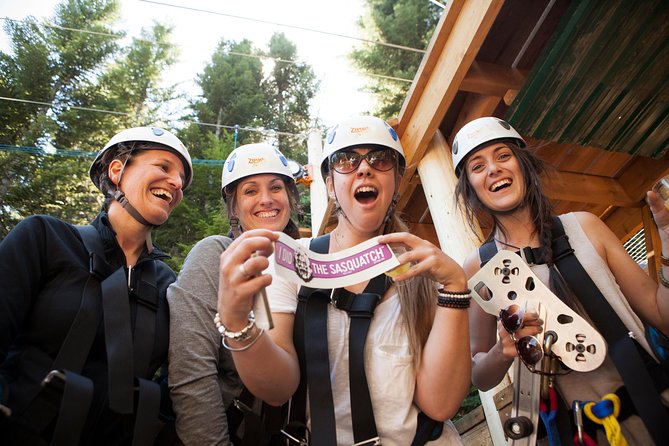
REVIEW · WHISTLER & THE SEA TO SKY HIGHWAY
Whistler Sasquatch® Zipline
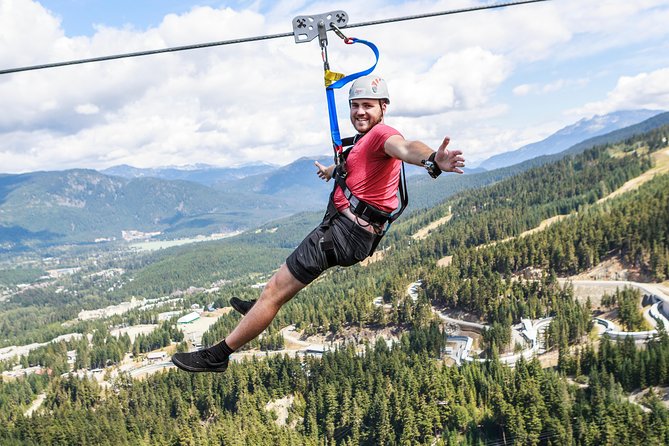
Whistler’s Sasquatch feels like flight. This small-group zipline ride uses the mountains as your launch pad, starting with the Blackcomb Gondola and ending with a smooth drop to Whistler Village, so you get scenery most visitors never see. I love the hands-on guidance and the way the route is built around views, not just the thrill.
I also like the practical safety setup: helmets and a harness plus a clear team briefing, with guides who stay calm and help nervous first-timers, like Jacob, Joaquin, and Harry. The one drawback to keep in mind is that you should expect some walking, including a bit of uphill, and weather disruptions can change what you do that day.
In This Review
- Key highlights before you go
- Route, timing, and what the 1 hour 30 minutes adds up to
- From 4282 Mountain Square to Blackcomb Gondola, step by step
- The safety briefing and harness setup that makes the jump easier
- What you actually do on the Sasquatch: gondola, platform, then valley speed
- Views between Whistler and Blackcomb: the scenery most people miss
- The walk, the calm after the zip, and the uphill you should expect
- Value check: is $118.28 worth it for a zipline?
- Who this suits best, and who should think twice
- Booking and day-of tips for Whistler weather and quick changes
- Should you book the Whistler Sasquatch Zipline?
- FAQ
- Where does the Whistler Sasquatch Zipline tour start?
- How long is the Whistler Sasquatch Zipline experience?
- What is the price per person?
- What’s included in the tour?
- Do I need closed-toe shoes?
- Are there weight limits?
- What is the minimum age to participate?
- What is the group size limit?
- Does the tour operate in bad weather?
- Can I bring a bag or hanging camera?
- FAQ
- Can I cancel for a full refund?
Key highlights before you go
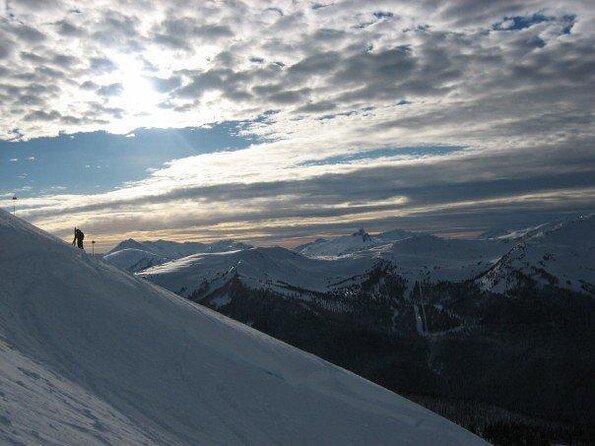
- Canada’s longest zipline opportunity with a real, high-speed launch and dramatic drop at the start
- Blackcomb Gondola access plus a short van ride to the platform, then a Whistler Village finish
- Small-group size (max 10), which usually means faster help and fewer waiting bottlenecks
- Guides who focus on reassurance, with examples like Jacob and Ned calming nervous riders
- Safety gear and procedures that feel thorough, from helmet and harness to step-by-step instructions
- You’ll plan around weather, since the experience runs in almost all conditions but still can be rescheduled if the mountain shuts down
The highway north, in more versions
- Zipline Adventure in Whistler★ 5.0 · 1,367 reviews
- Whistler Odyssey Tour: Off-Road Buggy Adventure★ 5.0 · 750 reviews
- Whistler Wilderness Run Snowmobile Tour★ 5.0 · 724 reviews
- 2 Hour Wilderness Adventure Snowmobile Tour in Whistler★ 5.0 · 610 reviews
Route, timing, and what the 1 hour 30 minutes adds up to
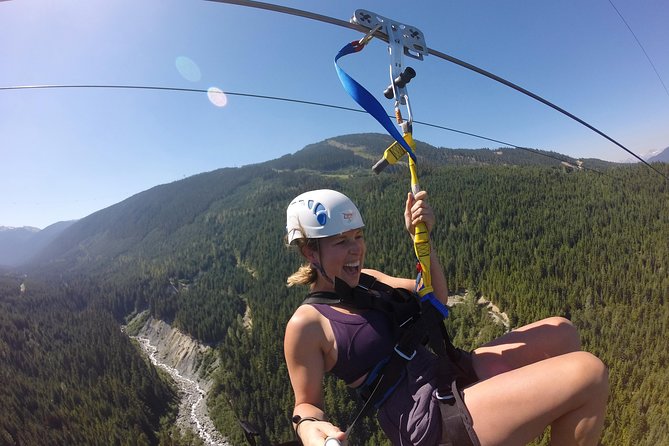
On the calendar, the Whistler Sasquatch Zipline is about 1 hour 30 minutes. In real life, that usually means you’ll spend the bulk of that time moving between the meeting point, gondolas, the platform area, gear up, and then getting to the end point back in Whistler Village. The actual zip moment is quick, but the lead-up makes it feel like a full outing.
You’ll also want to treat this like an activity with “just enough time” for other Whistler plans. It’s not a slow, wandering tour. The pace is more like: get geared, get briefed, go. If you build your day around that rhythm, you’ll enjoy it more.
One more booking reality: it’s a popular slot. On average, people book about 17 days in advance, so if you’re traveling in peak season, I’d aim earlier rather than later.
From 4282 Mountain Square to Blackcomb Gondola, step by step
Your tour starts at 4282 Mountain Square, Whistler, BC V8E 1B9 and returns there at the end. That matters because you’re not tied to some remote parking lot or an extra shuttle headache.
From the meeting point, the tour includes a professional 4×4 shuttle driver. The route uses the Blackcomb Gondola, then adds a short van ride to the launch platform. This matters because it reduces your “where do we go next?” stress. You show up, check in, and the mountain route is handled.
Once you’re in motion, you’ll notice the tour isn’t just about the zipline. The gondola ride is part of the experience. It gives you altitude and a first taste of the scale of Whistler and Blackcomb before you strap in.
Practical tip: wear layers you can handle in quick temperature swings. Gondola areas can feel chilly even when Whistler Village is comfortable.
The safety briefing and harness setup that makes the jump easier
The best part of this tour, in my view, is how the team sets you up to succeed. You start with the gear basics: helmet and harness, plus clear guidance on what to do before you move to the launch pad. You’ll also have multiple hand sanitizer stations, which is a small detail but nice when you’re touching equipment and gear.
Most riders come for the adrenaline. But the guides are what turn adrenaline into confidence. People specifically call out guides like Joaquin, Murray, Talia, and Sasha for calming nervous first-timers and keeping the safety message simple and steady. That’s exactly what you want when you’re about to step into open air at speed.
Here’s the thing I’d plan for: the takeoff is a moment where your brain has to switch from “I’m standing” to “I’m flying.” The clearer the instructions, the less time you spend overthinking it.
Also note a gear rule that can surprise people: no bags, purses, or hanging cameras are permitted. Bring a small, secure way to carry your essentials, and save your hands for the ride.
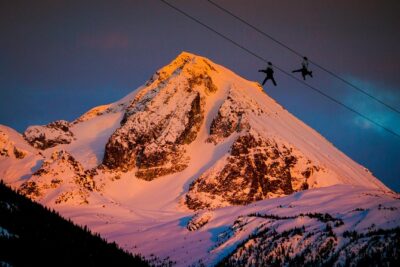
What you actually do on the Sasquatch: gondola, platform, then valley speed
The Sasquatch zipline experience follows a clean sequence.
First, you access the ride via the Blackcomb Gondola. Then you take a short van ride to the launch platform. At that point, it’s harness on, confirm your fit, listen to the final cues, and then you go.
Once you zip across the valley, you don’t just end at a platform in the woods. You’ll take a short walk to the mid-station on the Whistler Gondola, then download to Whistler Village. That’s a smart design for your body and your day. You get off the zip, move at a controlled pace, and then finish with a gondola ride instead of a long trek.
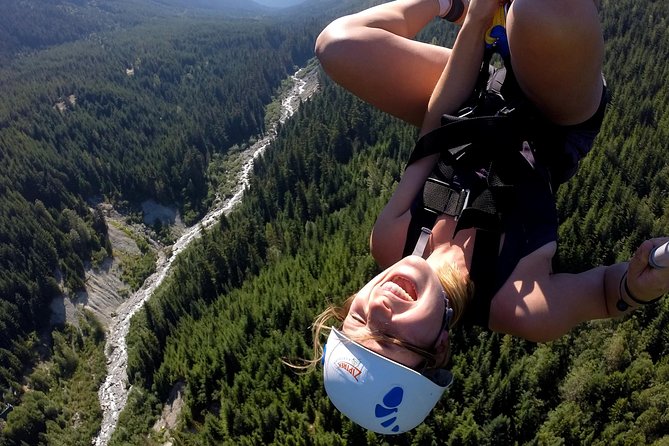
Speed and wow factor: the ride is fast. One review mentions around 130 km/h, and another highlights a thrill that feels closer to a rocket-through-the-trees moment than a calm glide. Another mentioned a reported run of about 1.4 miles. You don’t need to obsess over numbers. The point is this line feels serious, even for experienced zipliners.
And yes, it’s dramatic at the beginning. Riders describe a big drop right after you launch, so if heights bother you, don’t pretend they won’t. Use the briefing, ask the guide any questions you have, and focus on the line cues.
Views between Whistler and Blackcomb: the scenery most people miss
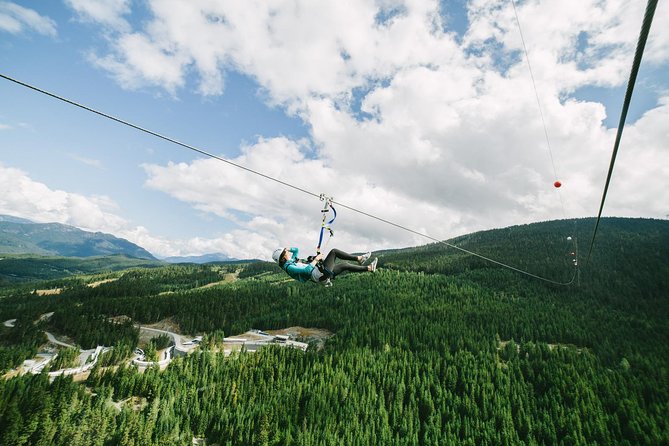
If you only care about speed, you’ll still have a great time. But what makes this tour worth it, beyond the thrill, is the vantage points.
You’re moving through alpine zones at altitude, first by gondola, then across the valley, and finally back down to Whistler Village via gondola. That creates a layered “before, during, after” view of the landscape.
Riders call out spectacular scenery and wildlife moments like black bears and marmots during the route. I wouldn’t count on animal sightings every time, but it’s a good reminder that you’re not just strapped to a cable above empty air. You’re traveling through a real mountain ecosystem.
If you like photos, plan for hands-free and secure handling. The tour rules say no hanging cameras, and one guest notes you should bring a glasses lanyard and use a zipped pocket for your phone or camera. If your eyewear can slip, you’ll want it secured before you launch.
The walk, the calm after the zip, and the uphill you should expect
After the main zip is done, there’s a bit of movement. You’ll do a short walk to the Whistler Gondola mid-station, then ride down to Whistler Village.
That short walk can still feel like a workout because you’re coming right off a high-adrenaline activity. One review mentions a steep hill up as part of the process after the ride. Another notes there’s some uphill walking and a warning that the descent does not mean you get to stop thinking about footing.
If you’re traveling with kids, build in the idea that this is not purely “sit and ride.” It’s active, and it asks you to stand, walk, and follow instructions in mountain terrain.
Good news: the guides do seem to watch people closely. One review describes staff arranging extra help when a rider’s leg gave out, including a private guide and an ATV. You should still plan for your own comfort, but it’s reassuring to see the team respond when someone needs assistance.
Value check: is $118.28 worth it for a zipline?
At $118.28 per person, the Sasquatch zipline isn’t a budget add-on. So here’s how I’d judge the value.
First, the price is bundled with real costs you’d otherwise pay for yourself:
- Helmet and harness included
- Blackcomb Gondola is included during Whistler Blackcomb operating hours
- Professional 4×4 shuttle is included
- The tour runs as a guided small-group experience with safety support
- Sanitizer stations are provided
Second, you’re getting a specific kind of experience: a fast, long-feeling line with a dramatic start, plus the mountain transport piece. It’s not just the cable ride. You’re buying a full mountain outing, and you benefit from the logistics being handled.
There is one cost you might choose to add: a GoPro rental. One review mentions an additional $45 CAD to rent a GoPro, if you want a more permanent record. If you’re the type who wants proof, budget for that choice.
If you already plan to ride gondolas anyway, this feels more like “buy the view plus the thrill together” rather than “pay extra just for speed.” If you’re only in Whistler for a day or two and want one standout action experience, the value tends to make sense.
Who this suits best, and who should think twice
This is built for most people who can meet the basic requirements.
You need:
- Age minimum 10 years old
- If you’re 10 to 18, you must be accompanied by an adult 19+
- Weight minimum 75 pounds and maximum 275 pounds
- Closed-toe, secure shoes only (no sandals or slip-ons like Crocs)
That footwear detail matters more than people expect. You’ll be moving around alpine platforms and stations where secure footing helps a lot.
Who it’s best for:
- Adults who want a high-impact zipline that still feels well-run
- Families with older kids who can handle harness prep and a bit of walking
- First-time zipliners who want strong instruction and reassurance, the kind highlighted by guides like Joaquin and Ned
Who should think twice:
- Anyone who cannot comfortably stand and walk in alpine terrain
- Anyone who is likely to struggle with the idea of a dramatic launch and open-air speed
If you have a mobility concern, the best approach is to ask the team before you go and be honest about what might limit you. One rider’s story shows the staff can be flexible when something unexpected happens.
Booking and day-of tips for Whistler weather and quick changes
Whistler weather can turn fast. The good news is that this tour is described as operating in almost all weather conditions. The mountains don’t always cooperate, though.
If the experience is cancelled due to poor weather, you’ll be offered an alternative date or a full refund. So build your schedule with a little slack if you can.
Day-of reality tip: bring clothing you can handle wind, mist, and cold. Even when it’s sunny in town, the gondola and the launch area can feel different.
Also plan for the gear rules:
- No bags or purses
- No hanging cameras
- If you wear eyewear, you need it secured so you don’t lose it mid-ride, and the supplier won’t be responsible for lost items
If you care about photos, consider how you’ll carry your phone or camera safely. One rider recommends a zipped pocket and a glasses lanyard.
Finally, remember the max group size is 10 travelers. That small number is part of why instructions can feel personal. Show up on time, listen closely, and you’ll get a smoother ride.
Should you book the Whistler Sasquatch Zipline?
If you want one activity in Whistler that blends big mountain logistics with a serious adrenaline moment, I’d book this. The strongest reasons are simple: excellent safety focus, professional gear and briefing, and an experience route that includes both gondolas and the valley crossing instead of only the zip.
I’d especially recommend it if:
- You like thrill rides but prefer a guided setup
- You want views from both Blackcomb and Whistler sides
- You’re traveling in a small group or as a couple and want an organized experience
Skip it if:
- You’re not comfortable with heights and a dramatic drop
- You need a fully seated, low-walking activity
Bottom line: for the money, you’re paying for more than a cable. You’re paying for a well-run mountain outing that gives you speed, views, and a team that takes the jump seriously.
FAQ
Where does the Whistler Sasquatch Zipline tour start?
The start location is 4282 Mountain Square, Whistler, BC V8E 1B9, Canada.
How long is the Whistler Sasquatch Zipline experience?
It runs about 1 hour 30 minutes (approx.).
What is the price per person?
The price is $118.28 per person.
What’s included in the tour?
It includes a professional 4×4 shuttle driver, use of helmet and harness, the Blackcomb Gondola during WB operating hours only, and multiple hand sanitizer stations.
Do I need closed-toe shoes?
Yes. Closed-toe, secure shoes are required. Sandals and slip-ons, such as Crocs and Birkenstocks, are not permitted.
Are there weight limits?
Yes. The minimum weight is 75 pounds and the maximum weight is 275 pounds.
What is the minimum age to participate?
The minimum age is 10 years old. Participants aged 10 to 18 must be accompanied by an adult 19+.
What is the group size limit?
The maximum number of travelers is 10.
Does the tour operate in bad weather?
It operates in almost all weather conditions. If it is cancelled due to poor weather, you’ll be offered an alternative date or a full refund.
Can I bring a bag or hanging camera?
No. No bags, purses, or hanging cameras are permitted.
FAQ
Can I cancel for a full refund?
Yes. You can cancel up to 24 hours in advance for a full refund.
The Road North to Whistler
Just off the notebook: recent Whistler write-ups
- Whistler: Guided Wilderness Hike
★ 5.0 · 4 reviews - Paradise Valley: Bee Adventure Tour!
★ 5.0 · 4 reviews - From Vancouver: Shannon Falls and Whistler Sightseeing Tour
★ 4.1 · 4 reviews - Whistler Helicopter Tour: Glaciers and Black Tusk
★ 4.8 · 5 reviews - Whistler Family Buggy Easy Tour
★ 5.0 · 5 reviews - Whistler: Axe Throwing Experience
★ 5.0 · 6 reviews
Whistler & the Sea to Sky Highway, compared.
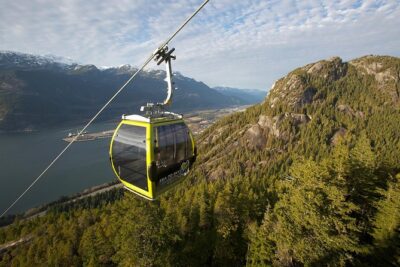 ★ 5.0From Vancouver: Whistler & Sea to Sky Gondola with Shannon FallsFrom $1731,640 reviews
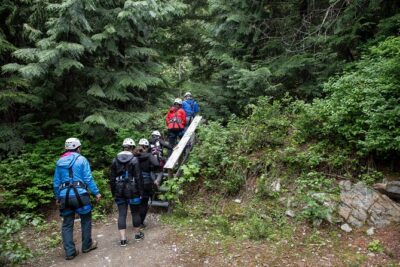 ★ 5.0Zipline Adventure in WhistlerFrom $1261,367 reviews
 ★ 4.8Whistler, Sea to Sky Gondola, and Shannon Falls Day TripFrom $1411,134 reviews
 ★ 5.0Whistler and Sea to Sky Gondola Tour + Shannon FallsFrom $161882 reviews
 ★ 5.0Whistler Odyssey Tour: Off-Road Buggy AdventureFrom $275750 reviews
 ★ 4.5Whistler & Sea to Sky Gondola Day Trip from VancouverFrom $185725 reviews
 ★ 5.0Whistler Wilderness Run Snowmobile TourFrom $236724 reviews
 ★ 4.7Vancouver: Sea to Sky Gondola and Whistler Day TripFrom $156636 reviews
Browse the lists this tour appears in